First Look + Setup: DJI Mavic Air 2 – Fly More Combo

Today we’re taking a look at the DJI Mavic Air 2 drone – one of the most capable consumer drones available – and specifically the Fly More Combo package, which includes a set of accessories.
Unboxing + Setup Video
Packaging + Contents

DJI’s box for the Mavic Air 2 Fly More Combo is fairly compact and feels premium. On the back are list of the contents, the usual regulatory labels, and links to the DJI Fly mobile apps for iOS and Android (note that this is different from the DJI Go app used by some other DJI Mavic drones).

The Fly More Combo includes a bunch of accessories – though you can purchase most of them individually as well (see the links below):
- DJI Mavic Air 2 Drone
- DJI Mavic Air 2 Shoulder Bag
- DJI Remote Controller (note: DJI also has a Fly More Combo with the Smart Controller instead – that has a screen of its own)
- 3x short USB cables for DJI Remote Controller (USB-C to C, USB-C to Apple Lightning, USB-C to Micro-USB)
- 2x control sticks for DJI Remote Controller
- 3x DJI Mavic Air 2 Intelligent Batteries
- DJI 37W AC Adapter/Charger (model P2C38)
- DJI Battery Charging Hub (model P2CH)
- 6x pairs of DJI Mavic Air 2 Low-Noise Propellers
- DJI Battery to USB-A adapter (to use a drone battery to power a USB device)
- DJI Mavic Air 2 ND Filters Set
- USB-C to A cable (to charge the remote controller or plug it into a PC for flight data or the DJI Flight Simulator)
- User Manuals
DJI Shoulder Bag


The Fly More Combo includes DJI’s travel case for the Mavic Air 2, the DJI Shoulder Bag – which is also available to purchase here.
The bag says DJI Mavic in the corner and feels soft to the touch. There’s a textured portion on the sides, a zipper pocket up front with extra storage space, and the main area in the back with its zipper lined with a rubber gasket – providing some protection and a cleaner look.
The overall feel of the DJI Shoulder Bag is similar to that of a soft camera bag. It’s a compact solution to carry all the drone and all of its accessories. While it will not provide heavy impact protection, the bag does have a significant size and weight advantage over solutions like a hard case.
DJI Remote Controller

The DJI Remote Controller is intended to be used with a connected smartphone (or tablet), though it will work without one. DJI does offer a Fly More Combo with the DJI Smart Controller instead — that controller, by contrast, is intended for standalone operation, with its own built-in screen.
The Remote Controller is made of a premium-feeling gray plastic and features removable control sticks. When not in use, the sticks can be unscrewed and stowed in slots at the bottom of the controller, where we also see a USB-C port. The USB-C port is used to charge the controller’s internal battery and to connect the controller to a PC to download the drone’s flight log or to use the DJI Flight Simulator. Note that while DJI ships the Remote Controller with a USB-C to USB-A cable, we have confirmed that the controller thankfully does successfully charge over a USB-C to C cable (unlike many other Chinese USB-C devices, which unfortunate lack the correct resistor for some reason).

The front center of the controller features a power button, flight mode button (to switch between Tripod, Normal, and Sport modes), and a Return to Home button. In the top corners we have an extra function button (assignable to things like the drone’s downward-facing LED light) and a camera mode button (to switch between photo and video modes). At the top are the record button and a dial, which normally controls the vertical angle of the gimbal, and two black finger rests in the shoulder positions.
On the back are rubber grips on the sides and a grille area in the center. In the top center, we have a retractable piece that acts as both the smartphone holder and the antenna. This is spring-loaded, to accommodate different sizes of phones – though you’ll want to use a different solution to attach a tablet or other larger device.
With the phone holder popped out, two black plugs are visible – that is a very short cable with both ends plugged into the controller. In the US, that default cable is a USB-C to Apple Lightning cable – with the USB-C side (on the right) plugging into the controller and the Lightning side plugging into an Apple iPhone. DJI includes two alternative short cables in the bag – if you’re using a phone with a USB-C port, you should remove the Lightning cable and swap in the USB-C to USB-C cable. If your phone has a MicroUSB port, use the USB-C to MicroUSB cable instead.
The phone holder pops right back in for storage.
Drone – Mavic Air 2

The Mavic Air 2 itself is quite compact, though it’s a big larger than the previous Mavic Air and closer in size to the Mavic Pro models.
The drone ships with lots of stickers on it; the arms say A and B, which we’ll get to shortly. At the bottom, are the various cameras for landing and obstacle avoidance, as well as an LED auxiliary light. On the back are two cameras for obstacle avoidance, and on the front, two more for obstacle avoidance, and the main capture camera on a gimbal.

The drone ships with a gimbal protector fitted quite tightly on the drone – possibly too tightly – but it does prevent the gimbal from flopping around when the drone is being carried. The gimbal houses the main camera – a half-inch sensor with 48 MP resolution (though primarily useful through the default 12 MP binned mode), an 84 degree field of view, and F 2.8 lens. The lens itself is fixed has a thin plastic frame in front that can be rotated off to attach filters like the three ND filters included in the Fly More Combo.
DJI Charging Hub

The Fly More Combo includes DJI’s Charging Hub – model P2CH. The hub has four DJI battery connectors – three for batteries and one on the side for the charger – and lets you charge three drone batteries from one AC adapter. The input rating is 2.82A at 13.2V, so roughly 37W.
The hub is very thin and quite convenient, though note that it charges the batteries sequentially — not simultaneously. So it will fully charge each battery before moving onto the next.
The Charging Hub is available to purchase separately as well from Amazon.
DJI AC Adapter

The Mavic Air 2 ships with a DJI AC adapter – model P2C38. The charger is global, working on 100-240 V, and the main output on the DJI battery connector is 13.2V at 2.82A – which matches the charging hub’s input level, 37.2W. There’s also a USB-A plug on the adapter, which provides 5V at up to 2A, for 10W max. This is for charging the Remote Controller, via the included USB-C to A cable, or any other USB devices you might have.

On one side of the charger is an ungrounded AC power plug. Our US model shipped with a US power cable, but the figure-8 looking port is a standard IEC C7 plug, so you could easily get a replacement for different countries if needed. On the other side is a short captive cable with the 10-pin DJI battery connector at the end.
DJI Intelligent Batteries
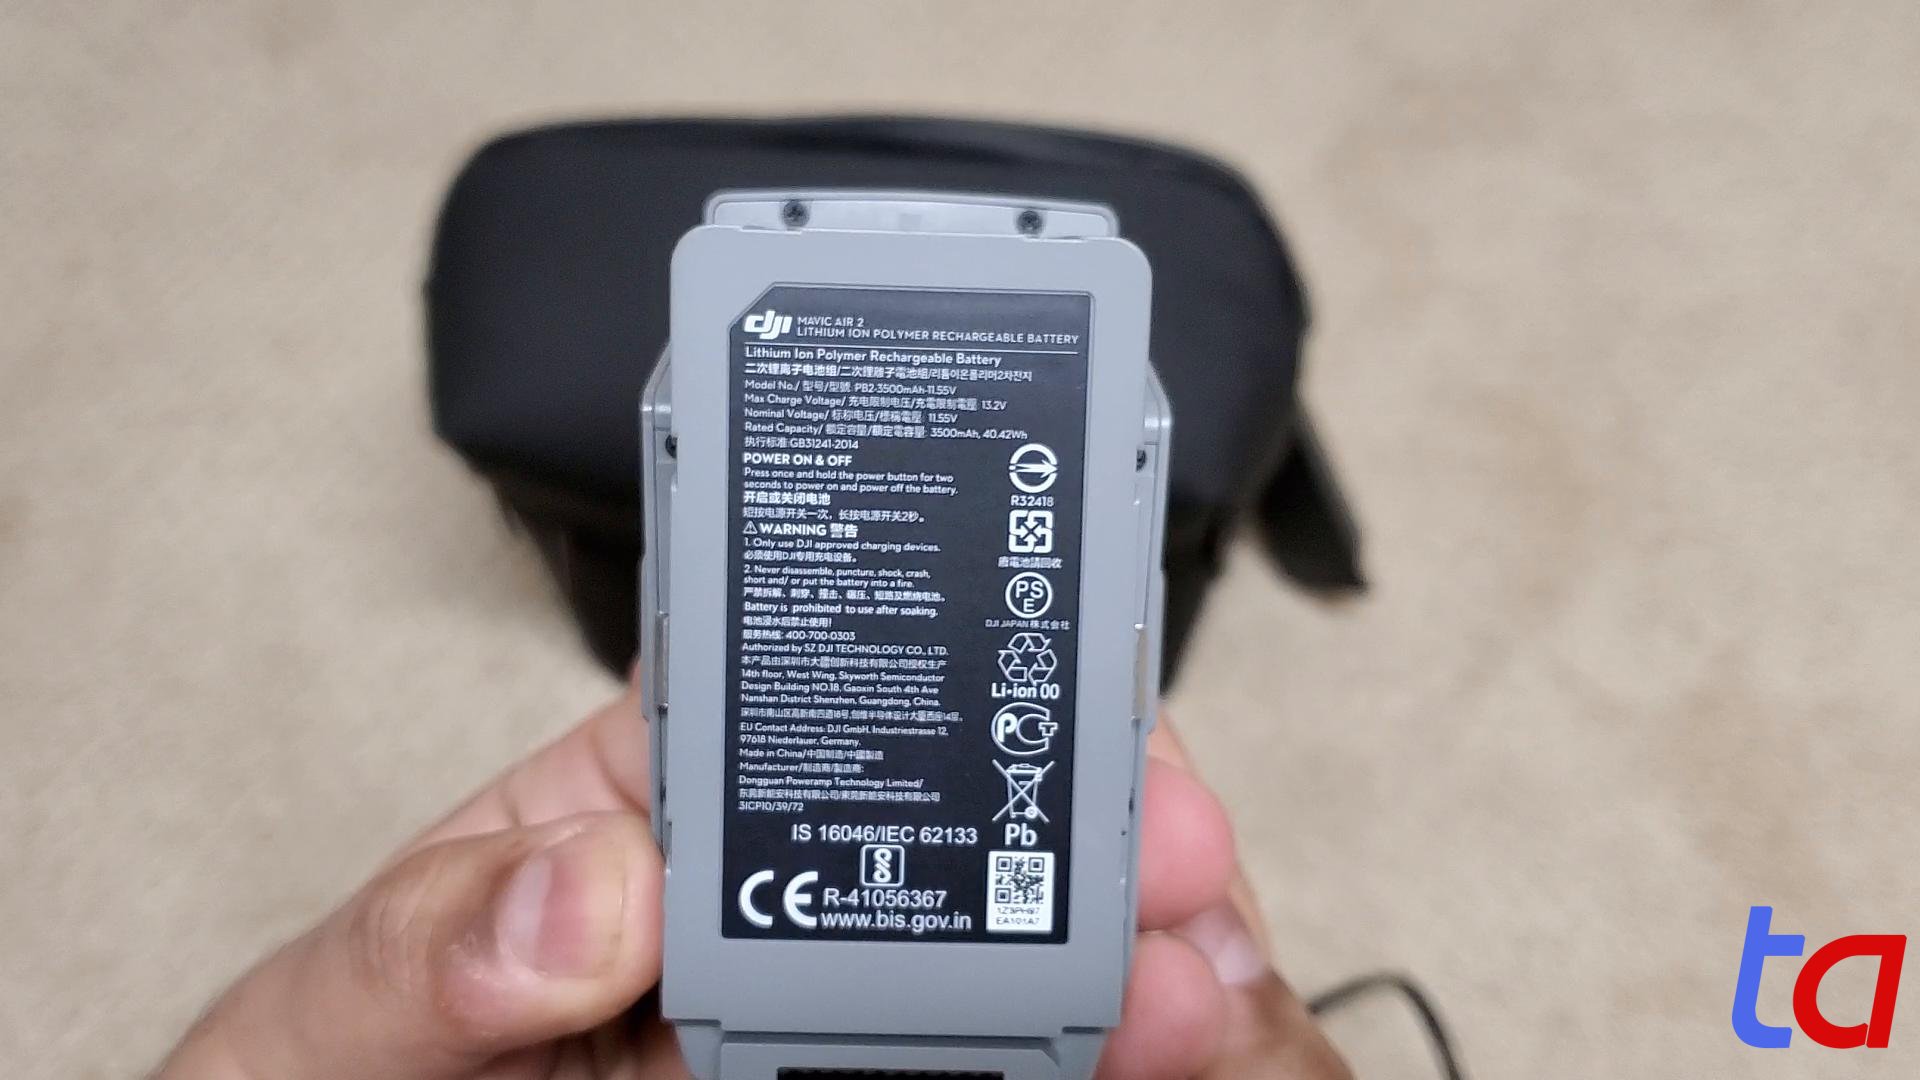
The Fly More Combo comes with three of DJI’s Intelligent Batteries – which are also available separately on Amazon.
The battery has a power button with integrated charge level indicator at the top, and spring-loaded contacts on the side to pull the battery out of the drone. The model number is PB2-3500mAh-11.55V. This is a nominal 11.55V battery with a max charging voltage of 13.2V and a capacity of 3500 mAh, meaning about 40 Wh.
One of the three batteries comes pre-inserted into the drone.
Installing the DJI Low-Noise Propellers

DJI equips the Fly More Combo with six pairs of its DJI Low-Noise Propellers (also available to purchase on Amazon). These come in two flavors – type “A” (part number 7238F, marked with a white stripe) and type “B” (part 7238F-CW, no white stripe).
The drone’s front two legs unfold to the sides, while the rear two unfold from below. Each of the flight motors comes with foam protector pads on top; removing them reveals that two of the motors are marked with white lines around the center and two are not.
To install the propellers, take the type B (unmarked) propellers and mount them on the two unmarked motors (which are also indicated with “B” stickers out of the box) by pushing and twisting the center of the propellers to lock them in. Next, do the same for the two type A (marked) propellers vis-à-vis the two marked motors.
Pre-Flight

Once the drone is physically set up, you’ll want to charge up all the batteries and the remote controller, which will take a few hours. Then remove the rest of the stickers, and you’ll be ready to fly.
We’d strongly recommend watching first flight videos online or going through DJI’s materials before actually flying the drone.
Product Links
If you’d like to purchase any of the items mentioned above, see the links below:
- DJI Mavic Air 2 Fly More Combo: https://amzn.to/3d5ElDu
- DJI Mavic Air 2 Fly More Combo with Smart Controller: https://amzn.to/3fY3d1H
- DJI Mavic Air 2 Intelligent Battery: https://amzn.to/3dLZ0eO
- DJI Mavic Air 2 Battery Charging Hub: https://amzn.to/3mBt5BR
- DJI Mavic Air 2 ND Filters Set (4/8/32): https://amzn.to/31Zb1YQ
- DJI Mavic Air 2 Low-Noise Propellers: https://amzn.to/3uBteIc
- DJI Mavic Air 2 Shoulder Bag: https://www.ebay.com/itm/DJI-Shoulder-Bag-for-Mavic-Air-2-Drone-NEW-Genuine-DJI-Case-with-Tags/143978574216
Note: Some links in this post may be affiliate links. We may be paid if you buy something or take an action after clicking one of these.